The Accelero Xtreme III is a custom air cooling solution by Arctic for graphics cards. Custom cooling for graphics cards aren’t that uncommon especially for liquid cooling modifications. We have also seen the recent introduction of brackets to allow the installation of your All-In-One liquid coolers for CPUs on GPUs. Such options definitely do help especially for people who want to go liquid but don’t have the knowledge or means to do a full custom one. The Xtreme III isn’t the latest model (version 4 is out already) but it is something that has been in the market for quite some time and is easier (at least for me) to get. Read on for the full review of the Arctic Xtreme III.
[toc]
Video Review
Introduction
I’ve heard a lot about Arctic’s custom GPU coolers, especially the Xtreme series. They do also have other smaller coolers available that perform relatively well even when compared to custom coolers from your major graphics card brands. This time around, I’m using a Reference R9 290 for testing.
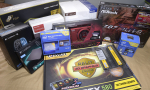
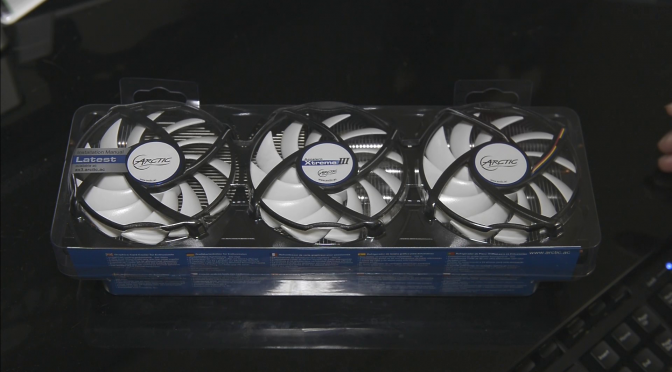
First things first, the cooler comes packed with the necessary accessories and add-ons required to install it properly on all the different card models listed on their website. For latest compatibility information, do look up their website as they cannot possibly keep updating their packaging for cost efficiency reasons. While the Xtreme III came out way before the latest R9 and GTX 700 series of cards, they are still compatible with those that have similar dimensions and schematics to older models. That said, their compatibility list cannot not be trusted fully seeing how the R9 290 has a tiny minor part that isn’t well covered by the Xtreme III. More on that later.
The cooler is massive. You will have to take note of the additional length and height that the cooler will create. In terms of height, you might face some issues if you are using the PCI slot directly above the graphics card. The backplate used with the cooler will create that slight increase in height that might obstruct whatever is in the PCI slot above.
The cooler comes with voltage controllers to control your fan speed. You can simply use the existing fan power connector on the graphics card and use the fan control options in your control panel or tools such as MSI Afterburner. That said, I highly recommend you to leave the fans at 100% regardless of load simply because it is extremely quiet and the way the VRMs are cooled, you will need that airflow.
Thoughts on First Time Installation
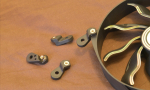
This is the first time I’m installing a custom cooler for my graphics card. I must say that it wasn’t so much of difficulty but it was rather tedious. Being the first time as well, I made a few mistakes here and there but it wasn’t too bad overall. Instructions on the manual are informative but not extensive as they only cover one sample model which will definitely differ from yours unless you’re using the exact same card. Do a Google search to see if there are any kind souls out there that have already installed the cooler on your card and follow them. Sometimes you don’t really know which heatsinks go where and it can cause some problems especially if your graphics card isn’t fully compatible. There are also some precautions you need to take such as using the insulation tapes to cover certain points to prevent short circuiting etc. For my case, one of the chips cannot be covered fully as by doing so will obstruct the installation of the mounting bracket. It doesn’t cause too much of a performance issue though.
For those first timers like myself, don’t worry! It is scary especially when there are so many things you need to do. Putting on multiple heat sinks, making sure it is in position and waiting for it to dry etc. Let me just say that after you do it the first time, the next few times will be way easier. At least that is how I feel. The common rule is simply to find the right size heat sinks that cover the most surface area of the chips and VRMs. If you see that the heatsinks’ base or fins are protruding close to other parts on the PCB, use the insulation strips provided over them. You don’t want anything connecting when they aren’t supposed to be.
Test Results
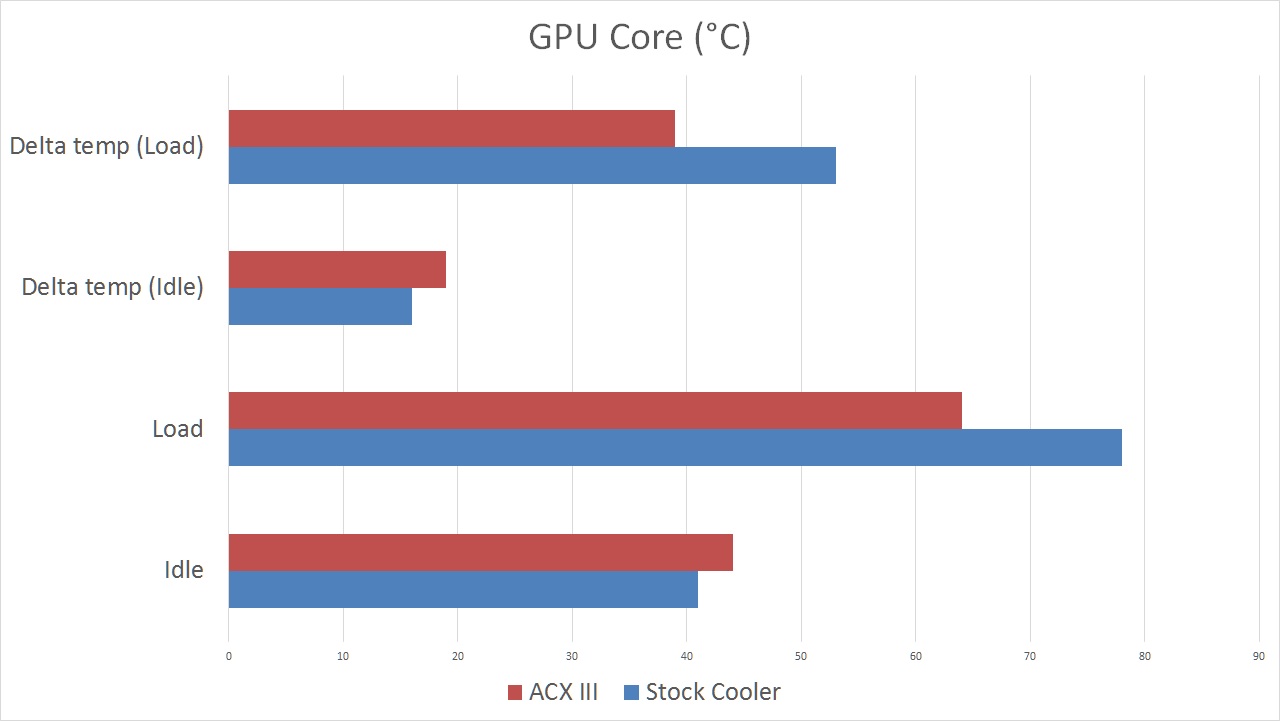
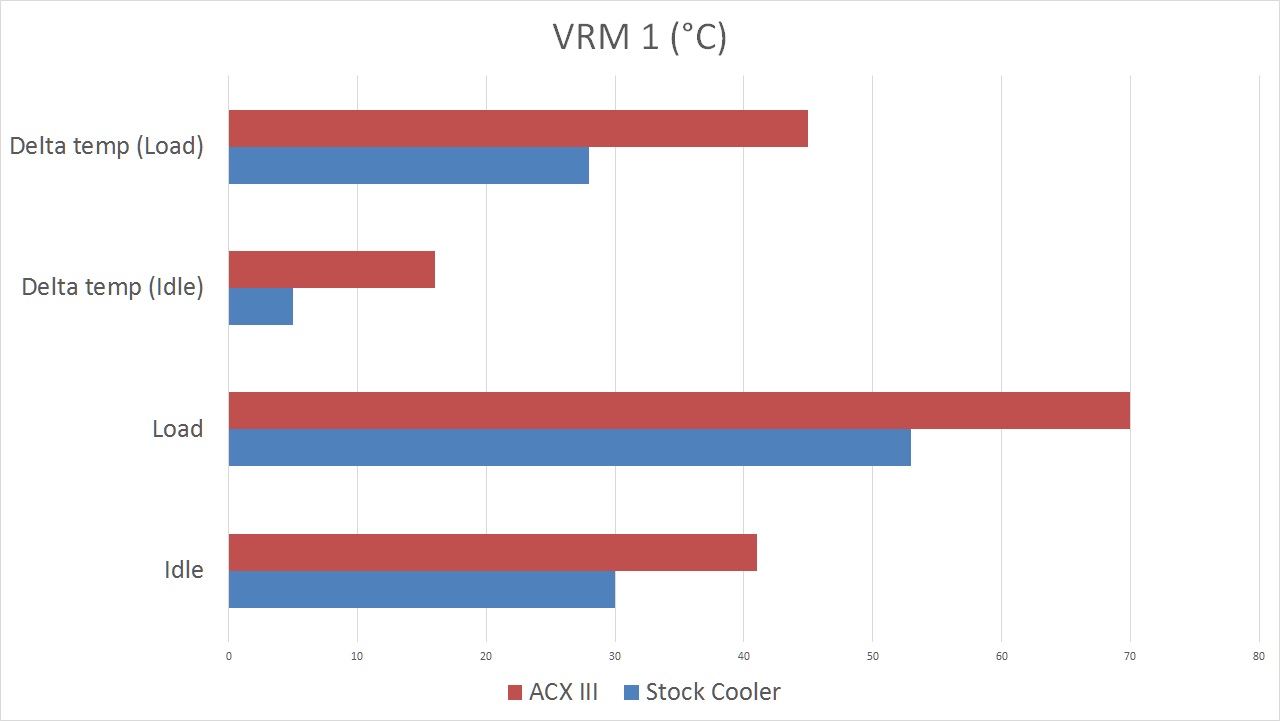
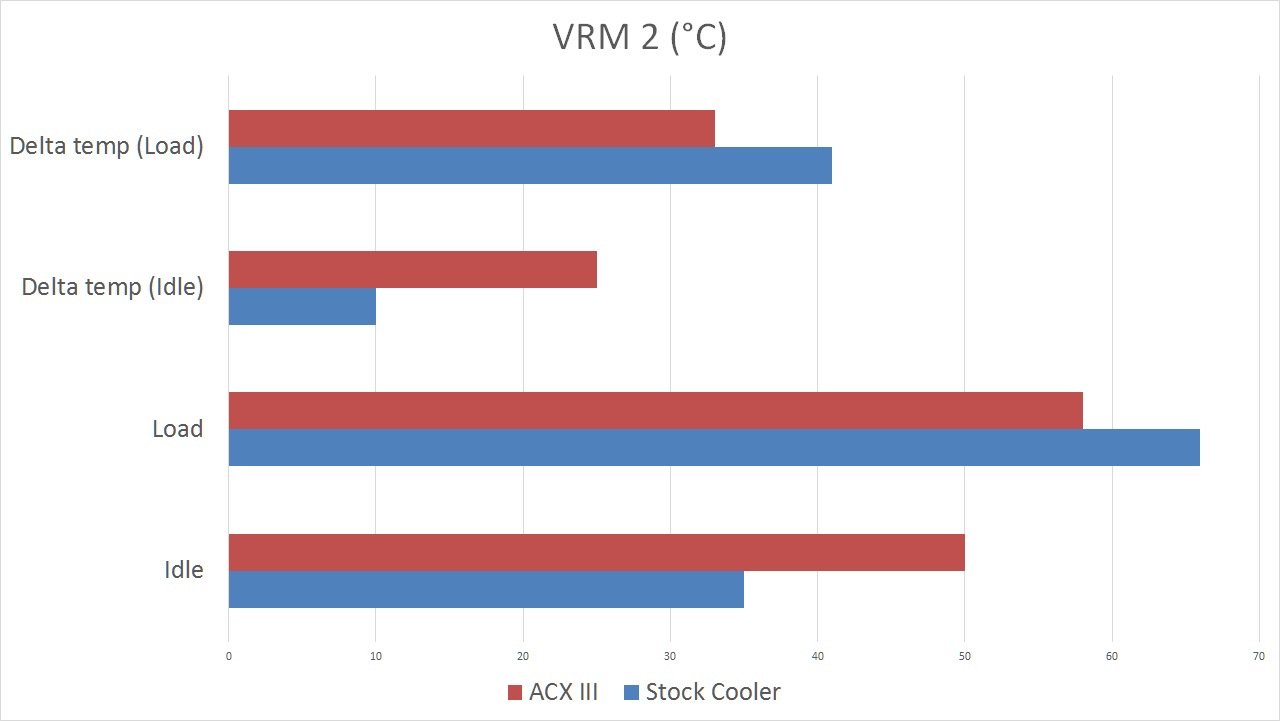
Here are the results after installing the Accelero Xtreme III on my R9 290 Reference Cooler. Do note that for the load temperatures, they are taken while gaming and not benchmarking.
Test System Specifications:
CPU: i7 4770K @ Stock w/ Noctua NH-D14
MB: AsRock Z87 Killer
RAM: 2 x 8GB Crucial Ballistix 1866MHz
PSU: FSP Aurum M 650W
Case: NZXT Phantom
Performance Evaluation
As you can see in the graphs above, the Accelero Xtreme III does provide an overall better cooling solution for my R9 290. What I didn’t show was the noise the cooler produced. The Xtreme III is close to silent even when put at 100%. Now I do not have any special sound meter or equipment to tell you the decibels the fans produce but in a normal setup, you will probably hear your case fans over the fans on the cooler.
If you compare the performance and noise, the Accelero Xtreme III is leaps and bounds ahead of the R9 290 Reference cooler. I must say though that the implementation of the cooling of VRMs on the stock cooler is definitely better compared to the Xtreme III. Let’s just say a pressurized contact will definitely transfer heat faster right than simply using thermal glue to stick heatsinks on.
With that said, if you were to overclock your graphics card (be it the R9 290 or not) and happen to need to add more voltage, do be extremely cautious as the VRM cooling isn’t the best. You don’t really need to worry about the GPU core but you definitely need to watch out for the VRMs. This also brings us to the point that you need to put your cooler fans at 100% as the VRM cooling depends heavily on the airflow.
Conclusion
Find your graphics card cooler too noisy or performs poorly? The Accelero Xtreme III will definitely help you. While there may be better products out there at the moment such as the water mounting brackets etc, the price for the Xtreme III is definitely on the lower end comparatively. For those worried about the installation, do watch out for my guide (or my failure rather and learn from my mistakes) or simply search the internet for it. It isn’t that difficult, you just need to be patient. Last of all I would like to reiterate how quiet the cooler is. My goodness is the R9 290 reference cooler loud!