Now that you’ve your hardware all picked up and assembled, it is time to put them to work. In this part, I will walk you through the initial installation of the Ubuntu Server OS itself and setting up OpenSSH for remote access. This will allow you to run the NAS “headless†(without a monitor) and place it at the location that you desire. With that said, read on for the walkthrough.
First things first, you will have to download the Ubuntu Server OS image and prepare a live USB or CD for installation. For stability reasons, I will recommend you to download the Long-term Support (LTS) edition (version 12.04.1 64bit). Once you’ve done all that and have your CD or USB ready,   ensure that your NAS is connected to the internet and that you have a monitor and keyboard hooked up to it. You will then plug whichever device you have prepared into the NAS and get the NAS to boot up from it (selecting boot priority to first for the device).
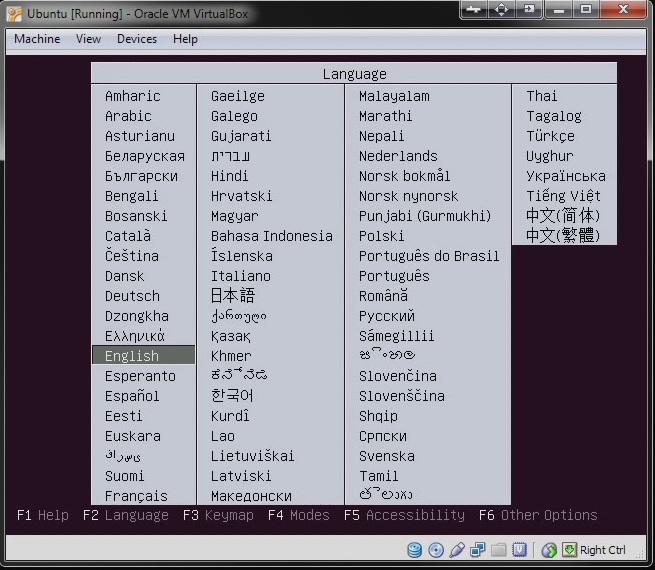
You will then be greeted with a language screen, select whichever language that you are most comfortable with and proceed on to install Ubuntu. For most of the part you will have to simply wait and let the installation process do its own work. Everything else should be left at default unless you know that you need something specific such as configuring a proxy server and whatnots. For some explanations of the different choices that you can make, watch the video walkthrough instead.
Just to note if you’re going to use part of your OS drive for data, you will want to partition it such that you have one partition for the OS and the other for your data and storage. I will recommend that you leave your OS drive to be by itself and not mix it up with your data as if the OS fails it will be easier to simply swap out that drive and have all your data still intact and accessible once you have a fresh OS drive placed in.
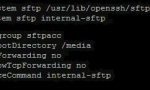
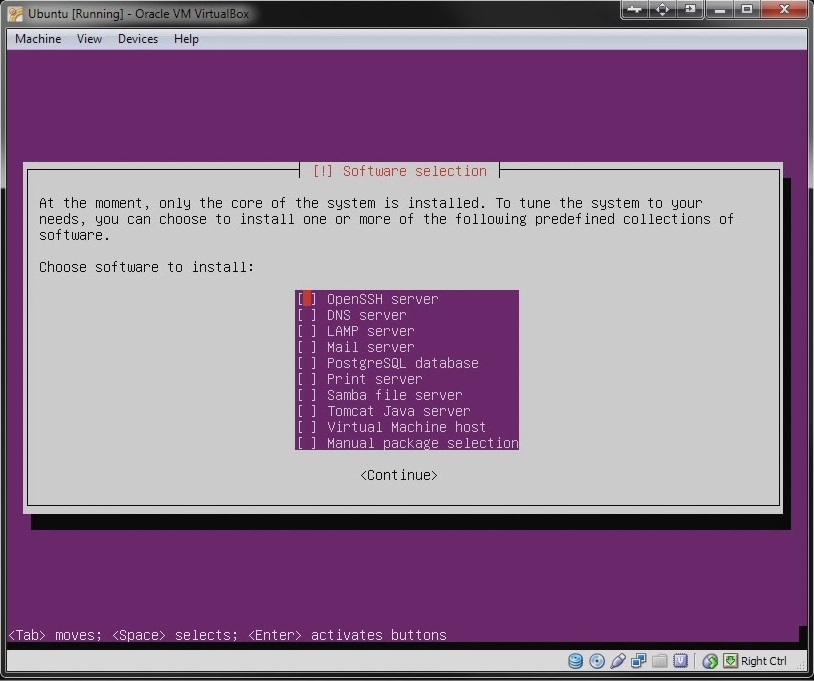
Once you have almost everything setup, you will have the choice to install several different softwares. What you will need to get your NAS up and running is basically just the OpenSSH server as well as the Samba File Server. In fact you actually just need the Samba File Server to start serving files up to your network. The OpenSSH server allows for remote management and access to the NAS which is vital but not compulsory. Nevertheless, select OpenSSH software by pressing the Space Bar and then hit Enter. The Samba File Server installation and setup will be discussed in detail in the next part.
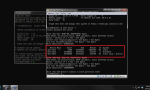
Your NAS should boot up and you will be greeted with the welcome (blank) screen of Ubuntu itself. Type in your User and Password and then you will be logged into the system. The next thing you will want to do is to setup a static IP address. You can use a dynamic IP but that will only result in more complications when setting your NAS for outside access. Otherwise just go ahead with the following steps. You will have to change the different numbers according to your network settings.
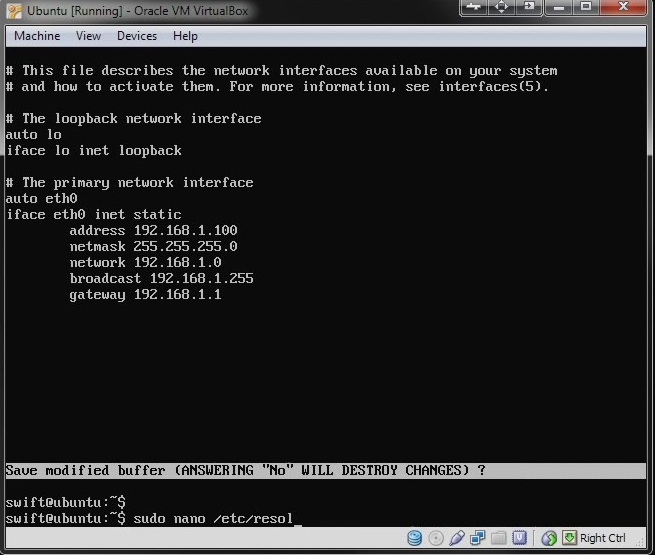
First you will want to type:
sudo nano /etc/network/interfaces
You will want to then enter the following (customize to your network settings):
auto eth0

iface eth0 inet static

address 192.168.1.10

netmask 255.255.255.0

network 192.168.1.0

broadcast 192.168.1.255

gateway 192.168.1.1
Note: Keep the static ip address of the NAS outside of the DHCP range of your router. This is to prevent any conflicting ip addresses.
Now you will have to edit the DNS setting by editing the resolv.conf file by the command:
sudo nano /etc/resolv.conf
You will simply then have to type in “name server†with the ip address of your name server following it as such:
name server 192.168.1.199
(that’s my settings anyways) Now for all the changes to take effect, you will have to restart the networking components of your NAS by:
sudo /etc/init.d/networking restart
Once done, try pinging a website such as google.com to see if you get a reply:
ping google.com
If you do get a reply your ip address settings is up and running. You can now try to connect remotely by using another computer in the network to SSH into it. A popular client that you can use for Windows is Putty. Simply type in the ip address of your NAS and you should be able to log in and access it. Just for precaution, reboot the NAS and once it is loaded up, try once more connecting remotely into the NAS. If you’re unable to connect, the SSH server is not starting up automatically after boot (which shouldn’t happen). Simply follow the steps as stated here. Reboot your NAS by typing:
sudo reboot
Now that you have Ubuntu up and running with remote access available, you can shift your NAS to the permanent location and have it run headless. You will now do everything through SSH access with another computer (which can also be done on the NAS itself if you prefer to do that). In the next part I will be walking you through the installation and setting up of the Samba File Server as well as the mounting and formatting of HDDs.