I’ve moved from a shared hosting provider to a virtual private server (VPS) provider for quite some time already. Having purchased an unmanaged solution, I had to learn how to set everything up myself. The first time was pretty time consuming as I was worried mainly about security and thus spent much time researching for the best practises before letting my VPS go live. Since then, I’ve moved host twice and during these moves, I spent much time again doing the very same thing. Not wanting to spend any more wasted time researching the same things over and over again, I decided to document the steps I took. Here are some steps that you can consider and follow before letting your VPS or DIY NAS go live.
Step 1: Update the server
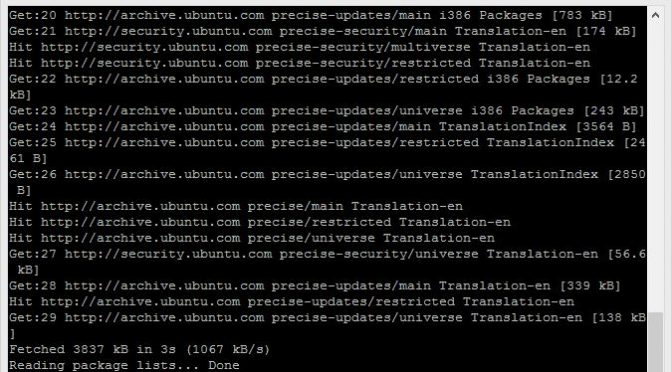
Simply run the commands:
sudo apt-get update

sudo apt-get upgrade
If a system restart is required, kindly do so. Otherwise, move on.
Step 2: Create user with sudo access
If access to your root account land into the wrong hands, the end of your server is near. It is thus wise to disable root access and login and simply use the sudo feature. Granting a user “sudo†privileges is giving administrative rights to that user. It is safer though (especially if you have more than one administrator) as you can limit actions as well as log them. When using the sudo command, users will have to enter their own user password. This meant that root password does not need to be shared among different people and you will have the ultimate control over your server. By using sudo, you will be using that sudo user’s own variables and settings which can be useful should you not want to tinker too much with the system root settings. There are many other positives and you can simply Google them but those mentioned are some of the more important ones.
Onwards we go, create a new user by entering:
sudo useradd -d /home/user -m user
-d links to the user’s home directory and -m forces the system to create that directory and folder should it not exist.
Once you’ve created the user, give it a password:
sudo passwd user
Once the user is created and has a password, it is time to give sudo access to it:
sudo adduser user sudo
To test out the new account you have created, you can simply open a new terminal and login. Try using the sudo account to perform some actions and see if it works. It should ask you for the user’s password the first time you run it. If you find that the interface of your shell is different than your root’s, you have to change the shell of the user by typing “chsh†and then “/bin/bash†or whatever else you want to use. You can either reconnect or simply type in “/bin/bash†(the previous step changes the default shell to use). Once you find that your new sudo user is working, you can close the terminal with the root access.
Step 3: Disable root access
It is time to disable root user login. To do so, simple enter the following:
sudo nano /etc/ssh/sshd_config
If you have an invalid command returned, you do not have “nano†installed. I recommend you to install it by “sudo apt-get install nanoâ€.
Find the following option “PermitRootLogin†and change it to “noâ€. It should look something like this:
# Authentication:
LoginGraceTime 120
PermitRootLogin no
StrictModes yes
Once done, restart the SSH service by entering:
sudo service ssh restart
You can try logging into your server using “root†and it should be denied.
Step 4: Disable text login, enable key authentication system
Using a key authentication system beefs up the security by a whole lot. You can read all the pros and cons (if any) about using the key authentication system but most if not all sites will recommend you using it. It is slightly more troublesome at the start especially when granting multiple user access but all of that will be worth it. For this step, make sure you have a ssh-key generator (putty has one) and a safe place to keep your private key.
Start by creating a ssh folder for the user:
mkdir ~/.ssh

chmod 700 ~/.ssh
Generate a public key from the private key (keep this file in all the devices you want to use to access your server) and copy that particular public key. Watch the video tutorial if you’re unsure of what to use. Create a file called “authorized_keys†within the new .ssh folder and within that file paste the public key:
nano ~/.ssh/authorized_keys
Save the file and change its’ permissions:
chmod 600 ~/.ssh/authorized_keys
It is now time to enabled the key-based login system. Edit the SSH configuration file:
sudo nano /etc/ssh/sshd_config
Find the following (if they’re commented, uncomment them) and make sure they look like this:
RSAAuthentication yes

PubkeyAuthentication yes
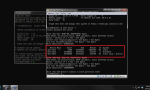
Once done, you can restart the SSH service and open a new terminal to test if the keys are working. To do so (assuming you are using Putty), make sure the application you are using is configured to provide the private key for logging in to the server. You should see that the pre-login text is slightly different, saying something about using a particular key.
Once you managed to login using the key, it is time to disable text password login:
sudo nano /etc/ssh/sshd_config
Find the following and ensure it looks like this:
PasswordAuthentication no
Save the file and restart you’re the SSH service. Open a new terminal and this time try using your text password to log in. It should give you an error.
Step 5: Implement firewall rules using IPTables
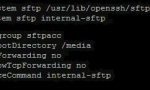
Refer to the following guide to setup your firewall. Make sure you have the relevant ports open depending on whatever services you are running on the server: DIY NAS – Basic Security: Firewall (iptables)
Step 6: Install and do whatever else
There is no common step 6 that I can share with you. Do whatever you want and need to with your server. Steps 1 to 5 are pretty much the essentials for basic server security.